


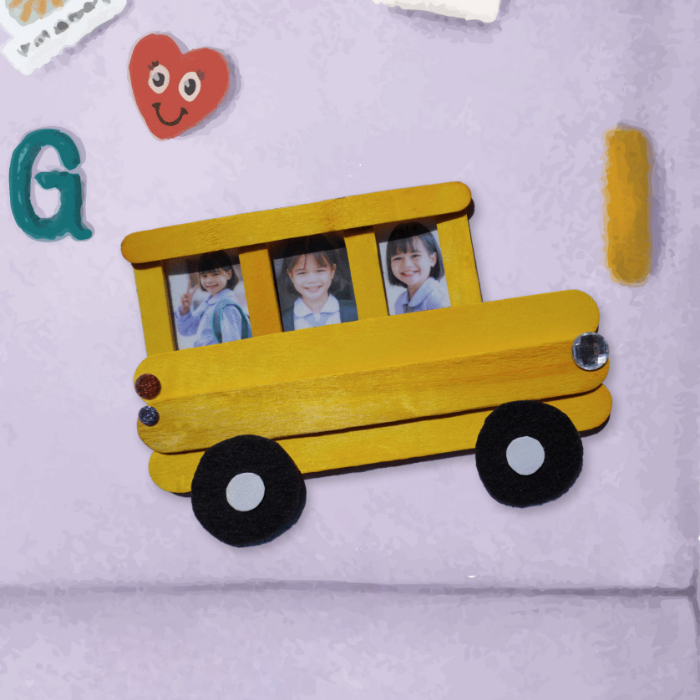
Bring the traditional découpage method up to date by decorating a plain picture frame with simple square and rectangular pieces of bold paper decorated with attractive designs. To finish the decoupaged picture frame we used rick rack trim and cute buttons.
To make a decoupaged picture frame you will need:
• Decorative paper in a variety of designs
• Scissors
• Picture frame with wide edges for découpage
• PVA/white glue
• Rick rack trim to fit frame
• Buttons to decorate
step 1. Cut out shapes Cut out a selection of squares and rectangles from the decorative paper and arrange the pieces in piles of the same design to make sticking them easier. You may like to arrange the paper on the frame before you start sticking to work out your design, or you can simply begin sticking and see where you end up!

step 2. Start sticking Begin sticking the shapes on the frame. Apply glue to the back of each paper square or rectangle. Press the edges of the paper flat with your fingers to make sure they don’t curl up. Continue sticking on the shapes until the frame is completely covered.

step 3. Decorate Apply glue to the back of the buttons and stick them on the frame at regular intervals. You could ask an adult to do this using a hot glue gun, as the glue sticks get very hot.

step 4. Finishing Cut four lengths of rick rack to fit around the frame aperture. Use PVA/white glue to stick the rick rack to the frame, neatly bordering the aperture. Leave to dry completely. Insert a picture in the frame to finish.

RAINY DAY BOOK OF THINGS TO MAKE AND DO BY CATHERINE WORAM AND CLARE YOUNGS RRP $34.99 BOOKREPS.CO.NZ/RYLAND PETERS & SMALL
more craft ideas from tots to teens:
